
Introduction to Drain Clogs and the Need for the Right Tools
- Understanding drain clogs and their impact on daily life
- The importance of having the right tools for efficient and safe unclogging
- Brief overview of the simple tools explored in this article
Understanding Drain Clogs and Their Impact on Daily Life
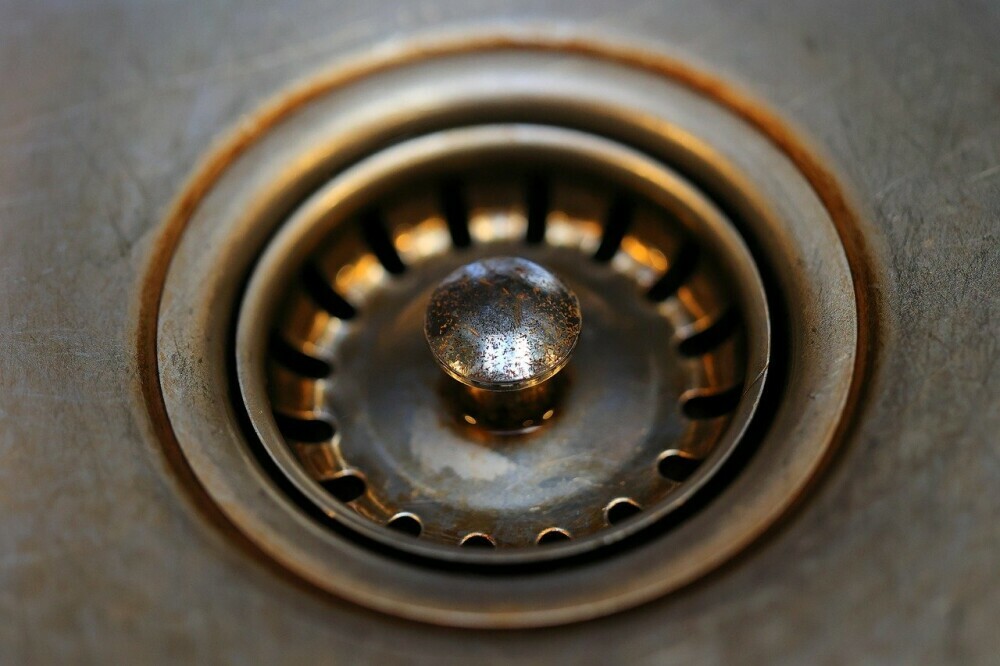
Drain clogs are a common household problem that can significantly disrupt daily activities. These clogs typically occur in sinks, showers, bathtubs, and toilets, where waste, hair, soap scum, grease, or other debris can accumulate and obstruct the flow of water. The impact of a clogged drain can range from minor inconveniences to major disruptions, depending on the severity and location of the blockage.
- Inconvenience and Discomfort: Even a minor clog can slow down the drainage process, creating standing water that can be inconvenient and unpleasant. For instance, a slow-draining sink can make it difficult to wash dishes, while a clogged shower drain can leave you standing in several inches of water.
- Hygiene Issues: Stagnant water caused by clogs can become a breeding ground for bacteria, mold, and mildew, leading to foul odors and potential health hazards. This is particularly concerning in areas like kitchens and bathrooms, where cleanliness is crucial for maintaining a healthy environment.
- Water Damage: Severe clogs can cause water to back up and overflow, leading to water damage in your home. This can result in costly repairs to floors, walls, and ceilings, and if left untreated, can promote the growth of mold and mildew, posing additional health risks.
- Pipe Damage: Persistent clogs can exert pressure on pipes, potentially causing them to crack or burst. This not only leads to expensive plumbing repairs but can also result in extensive property damage and water loss.
- Household Disruption: A major clog, particularly in a toilet, can render the fixture unusable until the issue is resolved. This can be highly disruptive to daily routines, particularly in homes with a limited number of bathrooms.
The Importance of Having the Right Tools for Efficient and Safe Unclogging
Having the correct tools to address drain clogs is essential for resolving the issue efficiently and safely without causing further damage to your plumbing system. The right tools can help you address clogs quickly and effectively, minimizing disruption and preventing potential damage.
- Efficiency: Proper tools designed specifically for unclogging drains can remove blockages faster and more efficiently than makeshift solutions. This can save you time and frustration, allowing you to return to your regular activities sooner.
- Safety: Using incorrect or makeshift tools for unclogging drains can damage your plumbing or even pose a safety risk. For example, inserting a metal hanger into a pipe could scratch or puncture it, while using chemicals incorrectly might result in harmful fumes or burns. The right tools are designed to be safe for both the user and the plumbing system.
- Prevention of Further Damage: Effective tools can address the root cause of the clog without damaging pipes or fixtures. For instance, drain snakes can navigate bends and joints without causing harm, whereas improper tools might exacerbate the problem or create new issues.
- Cost-Effectiveness: Investing in the right tools can be more economical in the long run. Professional plumbing services can be expensive, and while some situations require a plumber’s expertise, many common clogs can be resolved by homeowners with the right tools and knowledge.
- Empowerment: Having the right tools empowers homeowners to handle minor plumbing issues independently, providing a sense of control and self-reliance. This can be particularly valuable during emergencies or when professional help is not immediately available.
Brief Overview of the Simple Tools Explored in This Article
This article explores a variety of simple, yet effective tools designed for unclogging drains. Each tool serves a specific purpose and can be a valuable addition to your home toolkit.
- Plunger: A plunger is a basic but essential tool for dislodging simple clogs in toilets, sinks, and showers. It works by creating suction to push the blockage through the drain.
- Drain Snake (Auger): A drain snake is a flexible, coiled tool that can reach deeper into pipes to break up and remove stubborn clogs. Different types of snakes are available for sinks, toilets, and main sewer lines.
- Drain Cleaning Brush: This brush can be used to clean hair and debris from bathroom drains. It is particularly useful for showers and bathtubs where hair clogs are common.
- Plumber’s Tape (Teflon Tape): While not a tool for unclogging, plumber’s tape is essential for ensuring tight seals on threaded pipe joints, preventing leaks that can contribute to clogs or other plumbing issues.
- Chemical Drain Cleaners: While not recommended for regular use due to potential damage to pipes, chemical drain cleaners can be effective for dissolving organic matter in emergency situations. Natural alternatives, such as baking soda and vinegar, can also be explored.
- Drain Guards: Prevention is key, and drain guards help catch hair, food particles, and other debris before they can enter the drain and cause clogs.
These tools are relatively inexpensive and easy to use, making them accessible options for homeowners looking to maintain their plumbing systems and address minor clogs without professional intervention. Properly maintaining these tools and knowing when and how to use them can make a significant difference in the ease and efficiency of managing household clogs.
Plungers: A Plumber’s First Choice

- Different types of plungers and their specific uses
- Step-by-step guide on using a plunger effectively
- Tips on maintenance and storage to keep your plunger in good shape
Different Types of Plungers and Their Specific Uses
There are several types of plungers, each designed for specific tasks and types of clogs. Understanding the differences and uses of each type can help you choose the right tool for the job, ensuring the most effective and efficient unclogging experience.
- Cup Plunger (Sink Plunger):
- Description: This is the most common type of plunger, featuring a simple rubber cup attached to a straight handle. The cup is flat on the bottom.
- Uses: Best suited for flat surfaces, such as sinks, bathtubs, and showers. The cup creates a seal over the drain opening, allowing for effective suction and pressure to dislodge clogs.
- Limitations: Not ideal for toilets or other curved or irregular surfaces where it can’t form a proper seal.
- Flange Plunger (Toilet Plunger):
- Description: Similar to the cup plunger but with an additional soft rubber flange (also called a bell or funnel) extending from the bottom of the cup. This extension is designed to fit into the toilet drain.
- Uses: Specifically designed for toilets. The flange helps form a tight seal in the curved toilet drain, allowing for more effective plunging.
- Limitations: Less effective on flat surfaces like sinks and tubs due to the flange.
- Description: Made from hard plastic, this type of plunger resembles an accordion. It has a narrower, more tapered design to fit into toilet drains.
- Uses: Very powerful and effective for tough toilet clogs due to its ability to create strong pressure.
- Limitations: Harder to use and requires more force. Not suitable for sinks or tubs.
- Description: Combines features of both the cup and flange plungers. It has a flexible rubber design that creates a strong seal in toilets, though its shape resembles a beehive.
- Uses: Highly effective for toilets, offering a versatile fit for various toilet designs.
- Limitations: Less effective on flat surfaces.
- Description: This is a specialized plunger used mainly by professional plumbers for large pipes like those in industrial or commercial settings. It has a heavy-duty design and usually comes with a long handle.
- Uses: Suitable for large drains and pipes that require significant force to clear blockages.
- Limitations: Overkill for household clogs and not practical for everyday use.
Step-by-step Guide on Using a Plunger Effectively
To get the best results from your plunger, it’s essential to use it correctly. Here’s a detailed step-by-step guide for using a plunger effectively:
- Select the Right Plunger:
– Choose the type of plunger appropriate for the clogged fixture (e.g., cup plunger for sinks, flange plunger for toilets).
- Prepare the Area:
- Safety First: Wear gloves and, if necessary, protective eyewear. Place old towels or rags around the base of the fixture to catch any spills.
- Water Level: Ensure there is enough water in the fixture to cover the plunger’s cup. For sinks and tubs, add water if necessary. For toilets, you may need to adjust the water level after a flush.
- Create a Seal:
– Position the plunger’s cup directly over the drain opening.
– Press down to form a tight seal. In the case of a toilet, fit the flange into the drain to ensure a proper seal.
- Plunge Properly:
– Hold the plunger handle vertically and begin plunging with a steady, rhythmic motion. Start slowly to maintain the seal.
– Push down firmly but not too forcefully, then pull up sharply without breaking the seal. Repeat this action rapidly but consistently.
– Continue plunging for 15-20 seconds. You should feel resistance and then a breaking of the clog.
- Check for Success:
– After plunging, remove the plunger and check if the water starts to drain.
– If necessary, repeat the plunging process. Sometimes, multiple attempts are needed to clear a stubborn clog.
- Flush the System:
– Once the clog is cleared, flush the fixture with plenty of water to ensure the blockage is completely gone.
Tips on Maintenance and Storage to Keep Your Plunger in Good Shape
Maintaining your plunger properly can extend its lifespan and ensure it is ready for use when needed. Here are some tips for keeping your plunger in good shape:
- Cleaning After Use:
– After using the plunger, rinse it thoroughly with hot water to remove any residue or debris.
– For a deeper clean, soak the plunger in a solution of hot water and bleach (approx. 1 cup of bleach per gallon of water) for about 10-15 minutes. This helps disinfect and remove any lingering bacteria.
- Drying:
– Shake off excess water and allow the plunger to air dry completely to prevent mold and mildew. You can hang it over a bucket or place it in a well-ventilated area.
- Storage:
– Store the plunger in a dry, accessible location. Avoid keeping it in damp or humid environments.
– Consider using a plunger holder or tray to keep it upright and prevent it from contacting other surfaces. This helps maintain cleanliness and prevents potential contamination.
- Regular Inspections:
– Periodically inspect your plunger for signs of wear and tear, such as cracks, splits, or a hardened cup/flange.
– Replace the plunger if it shows significant signs of wear, as a damaged plunger won’t be as effective.
- Dedicated Storage Area:
– Designate a specific area for storing your plungers, separate from other cleaning tools, to avoid cross-contamination.
– For aesthetics and hygiene, you might store the plunger in a closed cabinet or an area not easily visible to ensure it is out of sight but still accessible.
By understanding the different types of plungers and their specific uses, following proper plunging techniques, and maintaining your tools, you can effectively manage clogs and ensure your plumbing fixtures remain functioning smoothly.
Hand Augers: Cranking Through the Clog

- What is a hand auger and when to use it
- Detailed instructions on safely using a hand auger to clear drains
- Caring for your auger to ensure longevity and effectiveness
What is a Hand Auger and When to Use It
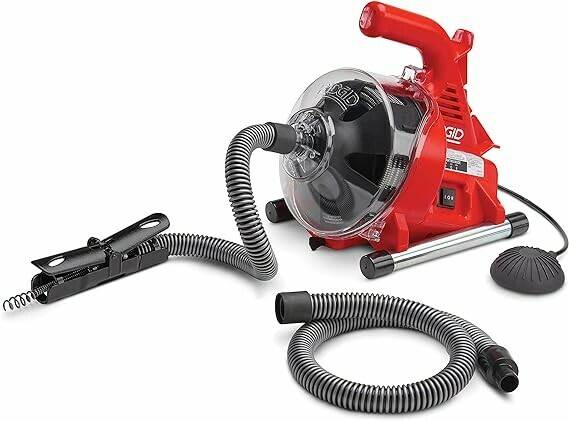
A hand auger, also known as a plumber’s snake or drain snake, is a manual tool designed specifically for clearing clogs from pipes and drains. It’s essentially a long, flexible metal cable with a coiled or corkscrew-like end, which can be inserted into pipes to break up or retrieve blockages.
Components of a Hand Auger:
- Cable:
– Typically made of durable, flexible steel.
– Lengths vary, but household models often range from 15 to 25 feet.
- Crank Handle:
– Attached to the rear of the tool, used to manually turn and extend the cable into the drain.
– Allows you to control the direction and force applied to the cable.
- Auger Head (Coiled End):
– A specialized tip designed to pierce, break up, or retrieve clogs.
– Some models come with interchangeable heads for different types of clogs.
When to Use a Hand Auger:
- Stubborn Clogs:
– Ideal for clogs that can’t be cleared with a plunger. These are usually deeper in the pipe or composed of solid materials like hair, soap scum, or foreign objects.
- Narrow or Curved Pipes:
– Effective in navigating through narrow or bending pipes where plungers and other tools can’t reach.
- Small to Medium-Sized Drains:
– Best suited for household sink, shower, and bathtub drains. Some hand augers are even capable of handling toilet clogs.
- Avoiding Harsh Chemicals:
– A great choice if you want to avoid or have already unsuccessfully tried chemical drain cleaners.
Detailed Instructions on Safely Using a Hand Auger to Clear Drains
Using a hand auger requires careful handling to avoid damage to your pipes and to ensure safety. Here is a step-by-step guide:
- Preparation:
- Safety Gear: Wear gloves and safety goggles to protect your hands and eyes from debris and water that may splash back.
- Area Prep: Lay down towels around the area to catch any water or grime that might escape during the process.
- Remove Stoppers: For sinks and bathtubs, remove any drain stoppers or strainers to gain clear access to the drain opening.
- Insert the Auger:
– Uncoil a few feet of the auger cable, keeping the handle end accessible.
– Insert the auger head into the drain opening carefully. If you’re using it in a toilet, feed it gently to avoid scratching the porcelain.
- Navigate the Pipe:
– Start turning the crank handle in a clockwise motion, while gently pushing the cable further into the drain.
– You may encounter some resistance; this could be bends in the pipe or the clog itself. Apply steady but gentle pressure to navigate through these points.
- Reaching the Clog:
– Once you feel the auger head hit the clog, continue turning the crank to allow the auger head to bite into the clog.
– Push and pull the cable slightly to help the auger head break up the clog into smaller pieces or entangle debris (like hair).
- Retrieving the Auger:
– Slowly start to pull the auger back out of the drain while continuing to turn the crank.
– Be patient, as yanking the cable can cause it to coil or damage the pipe.
- Clearing the Clog:
– Remove any debris collected on the auger head. You can use a towel or an old brush for this.
– If the clog seems to persist, reinsert the auger and repeat the process.
- Flushing the Drain:
– Once the clog is cleared, flush the drain with hot water to ensure any remaining debris is washed away.
- Clean Up:
– Thoroughly clean the auger with water and mild soap to remove grime and prevent corrosion.
– Disinfect the area around the drain and wash any towels you used.
Caring for Your Auger to Ensure Longevity and Effectiveness
Proper maintenance of your hand auger can extend its life and maintain its effectiveness. Here are some detailed care tips:
- Cleaning After Each Use:
- Immediate Rinse: After using the auger, rinse off any debris using a hose or faucet.
- Disinfect: Soak the auger in a solution of warm water and disinfectant for a few minutes to kill any bacteria or mildew. Ensure you use a disinfectant that won’t damage the metal.
- Dry Thoroughly: Dry the cable and handle completely to prevent rust. Wipe it down with a clean, dry cloth and leave it in a well-ventilated area to air dry further.
- Lubrication:
– Periodically apply a light coat of machine oil or a silicon-based lubricant to the cable. This helps prevent rust and keeps the cable flexible.
– Apply lubricant to the crank mechanism if it feels stiff. Use a lubricant designed for metal parts to keep it operating smoothly.
- Storage:
– Store the auger in a dry place to prevent rust. A garage, utility room, or basement works well, provided they aren’t damp.
– Consider hanging the auger or using a storage container to keep it organized and prevent the cable from tangling.
– If possible, keep the auger in a protective case to shield it from dust and other contaminants.
- Regular Inspections:
– Check the cable for signs of wear, such as kinks, frays, or rust spots. If the cable is significantly damaged, consider replacing it.
– Inspect the auger head for wear and tear. A dull or broken auger head should be replaced to ensure it effectively clears clogs.
- Handling with Care:
– Avoid using excessive force when operating the auger. Forcing it can damage both the tool and the plumbing.
– When withdrawing the cable, pull it out slowly and steadily to prevent it from coiling or kinking.
- Proper Usage:
– Reserve your hand auger for its intended purposes. Using it for tasks it wasn’t designed for can lead to damage.
– Never use a hand auger on electrical pipes or lines. Always ensure the tool you’re using is appropriate for the job to avoid accidents and damage.
By understanding what a hand auger is and when to use it, following detailed safety instructions for its use, and caring for it properly, you can maintain an effective tool that stands the test of time and effectively clears your drains.
Drain Snakes: Simple Yet Powerful
- The mechanic behind drain snakes and why they work
- How to properly snake a drain for optimal results
- Common mistakes to avoid when using a drain snake
The Mechanic Behind Drain Snakes and Why They Work
Drain snakes, also known as plumbing snakes or drain augers, are tools designed to clear clogs in plumbing systems. The mechanics behind them are quite interesting:
- Basic Structure:
– Drain snakes consist of a long, flexible metal cable with a coiled end and a handle.
– The cable is typically made of tightly wound steel wire, which provides flexibility while maintaining strong rigidity to navigate through the plumbing.
- Operation:
– The snake is inserted into a clogged drain and manually or mechanically turned.
– As the cable is pushed and rotated into the pipe, it navigates through bends and joints, reaching the source of the clog.
– The coiled end digs into the clog material (hair, grease, food particles, or other debris), breaking it apart or entangling it to pull out.
- Why They Work:
- Flexibility and Rigidity: The combination allows the snake to move through pipes without getting stuck while applying sufficient force to break up or remove the clog.
- Mechanical Action: The turning motion aids in cutting through tough obstructions compared to less dynamic tools like plungers.
- Versatility: Different snake designs, from manually operated to motorized augers for tougher clogs, cater to various scenarios, making them versatile for home and professional use.
How to Properly Snake a Drain for Optimal Results
Properly using a drain snake involves several steps and techniques to ensure effectiveness and avoid damage. Here’s a comprehensive guide:
- Preparation:
- Protective Gear: Wear gloves and, if necessary, safety goggles.
- Clear the Workspace: Remove any nearby objects that might be in the way or get damaged.
- Initial Insertion:
- Access the Drain: For sinks, remove the drain cover if possible. For toilets, you may need to use a toilet auger, a specialized type of snake.
– **Insert the Snake:** Gently feed the snake into the drain, turning the handle in a clockwise motion. This helps the snake move smoothly through the pipe.
- Navigating Thumbs and Bends:
- Maintain Gentle Pressure: Push the snake forward slowly, allowing it to navigate curves and bends.
- Rotate Consistently: Continue rotating the handle to work the snake through the pipes. Be patient and avoid forcing the snake to move too quickly, which can damage pipes.
- Reaching the Clog:
- Feeling Resistance: When you feel resistance, it likely means you’ve reached the clog.
- Break Up the Clog: Continue rotating and pushing the snake through the clog. The coiled end will either break it apart or entangle it.
- Removal:
- Retrieve the Snake: Slowly pull the snake out of the drain while continuing to rotate the handle. This helps pull out any dislodged debris.
- Clean the Snake: After removing the snake, thoroughly clean it to remove any gunk.
- Flush the Drain:
- Test the Drain: Run water to ensure it’s flowing properly.
- Repeat if Necessary: If the water is still slow draining, you might need to repeat the process.
Common Mistakes to Avoid When Using a Drain Snake
Using a drain snake may seem straightforward, but there are several common mistakes that can compromise the process or damage your plumbing:
- Forcing the Snake:
- Risk: Applying too much force can damage pipes, especially older or more fragile ones.
- Solution: Use steady, gentle pressure and be patient.
- Using the Wrong Type of Snake:
- Risk: Using an incorrect snake for the job (e.g., using a standard drain snake for deep clogs or mainline blockages) can be ineffective or damaging.
- Solution: Use the appropriate type of snake. For tougher, deeper clogs, consider a more heavy-duty or motorized auger.
- Not Tightening the Thumbscrew:
- Risk: On some snakes, there’s a thumbscrew to secure the cable. Forgetting to tighten it can cause the cable to retract unpredictably.
- Solution: Always check and tighten the thumbscrew before operating the snake.
- Skipping Clean-Up:
- Risk: Debris left on the snake can cause odors and potentially damage the tool.
- Solution: Clean the snake thoroughly after each use to maintain hygiene and ensure longevity of the tool.
- Ignoring Safety Precautions:
- Risk: Failure to wear gloves can result in hand injuries. Not using safety goggles can be risky if debris is dislodged forcefully.
- Solution:*Always wear appropriate safety gear.
- Not Testing the Drain:
- Risk: Assuming the clog is fully cleared without testing can be misleading, requiring multiple attempts.
- Solution: After snaking, always run water to test the drain. If it’s still slow, repeat the process.
By understanding the mechanics of drain snakes and following proper techniques, you can effectively clear clogs and maintain your plumbing system’s functionality while avoiding common pitfalls.
Enzymatic Drain Cleaners: The Eco-Friendly Option

- Understanding how enzymatic cleaners work to clear clogs
- Benefits of using environmentally safe cleaners in your home
- Precautionary measures and best practices for using enzymatic cleaners
Understanding How Enzymatic Cleaners Work to Clear Clogs
Enzymatic cleaners are a type of cleaning product that utilizes enzymes to break down organic matter, such as grease, food particles, and other debris, to clear clogs. Here’s how they work:
- Enzymes: Enzymes are biological molecules that act as catalysts, speeding up chemical reactions. In the case of enzymatic cleaners, specific enzymes target various compounds found in clogs.
- Action Mechanism:
- Targeted Breakdown: Each type of enzyme in the cleaner targets a specific type of organic material commonly found in clogs, such as proteins, fats, or carbohydrates.
- Digestive Process: When the enzymatic cleaner is applied to the clog, the enzymes start breaking down the organic matter into smaller, more easily removable particles.
- Biodegradable Solution: Unlike harsh chemical drain cleaners, enzymatic cleaners provide a more natural, biodegradable alternative for clearing clogs.
- Effectiveness:
- Time-Dependent: Enzymatic cleaners require some time to work effectively. The longer they remain in contact with the clog, the more thorough the breakdown process.
- Preventive Action: Enzymatic cleaners can also be used preventively to keep drains clear by breaking down organic matter before clogs form.
Benefits of Using Environmentally Safe Cleaners in Your Home
Choosing environmentally safe cleaners, including enzymatic cleaners, offers various benefits for your household and the planet:
- Safety:
- Non-Toxic Formulas: Environmentally safe cleaners are typically free from harsh chemicals, reducing the risk of exposure to toxic substances for you, your family, and pets.
- Air Quality: Many conventional cleaners contain volatile organic compounds (VOCs) that can contribute to indoor air pollution. Environmentally safe cleaners are often VOC-free, improving indoor air quality.
- Sustainability:
- Biodegradability: Environmentally safe cleaners are formulated to break down safely without harming ecosystems once they enter water systems.
- Reduced Environmental Impact: By choosing eco-friendly options, you contribute to reducing pollution and protecting aquatic life.
- Health Benefits:
- Allergen Reduction: Harsh chemicals in traditional cleaners can trigger allergies and respiratory issues. Environmentally safe cleaners offer a gentler alternative for sensitive individuals.
- Skin-Friendly: Safer ingredients make environmentally safe cleaners less likely to cause skin irritation or allergic reactions.
- Long-Term Impact:
- Preserving Resources: Opting for environmentally safe cleaners supports sustainable practices and encourages responsible consumption.
- Sustainable Choices: By incorporating eco-friendly products into your home, you contribute to a more sustainable lifestyle.
Precautionary Measures and Best Practices for Using Enzymatic Cleaners
To ensure safe and effective use of enzymatic cleaners in your home, consider the following precautionary measures and best practices:
- Read Instructions:
- Follow Manufacturer Guidelines: Read and adhere to the instructions provided by the manufacturer for the specific enzymatic cleaner you are using.
- Protective Gear:
- Use Gloves: Wear protective gloves to avoid skin contact with the cleaner, especially if you have sensitive skin.
- Proper Application:
- Pouring Technique: Pour the enzymatic cleaner directly into the drain according to the recommended dosage.
- Allow Contact Time: Let the cleaner sit for the specified duration to ensure thorough breakdown of clogs.
- Ventilation:
- Adequate Airflow: Ensure proper ventilation when using any cleaner to avoid inhaling fumes, although enzymatic cleaners usually produce minimal fumes.
- Storage:
- Secure Storage: Store enzymatic cleaners in a cool, dry place away from direct sunlight and out of reach of children and pets.
- Compatibility:
- Know Your Pipes: Ensure the enzymatic cleaner is safe to use with your specific plumbing system to avoid any potential damage.
Following these precautionary measures and best practices will help you effectively utilize enzymatic cleaners while maintaining a safe environment in your home.
High-Pressure Drain Blasters: The Power of Air

- What are high-pressure drain blasters and the science behind them
- Instructions on safe usage to prevent damage to pipes
- Comparing air blasters to other tools in terms of efficacy and ease of use
What Are High-Pressure Drain Blasters and the Science Behind Them
High-pressure drain blasters, also known as drain cleaners or water blasters, are tools used to clear clogs in drains and pipes by generating a powerful burst of pressurized air or water. Here’s the science behind how they work:
1. Pressure Generation
- Air or Water Power: High-pressure drain blasters typically use either compressed air or water to generate significant pressure within the device.
- Stored Energy: The pressure buildup occurs when the user pumps or triggers the blaster, compressing air or forcing water into a confined space.
- Clog Disruption:
- Force Application: When the trigger is activated, the pressurized air or water is released in a sudden burst, creating a high-velocity flow aimed at the clog.
- Impact on Clog: The force of the blast hits the clog with enough power to dislodge it or break it down into smaller pieces, allowing drainage to resume.
- Versatility and Safety:
- Variable Settings: Some high-pressure drain blasters offer adjustable pressure settings to accommodate different clog types and pipe materials.
- Non-Chemical Solution: Unlike chemical drain cleaners, high-pressure blasters provide a mechanical solution, which can be safer for both users and the environment.
Instructions on Safe Usage to Prevent Damage to Pipes
To ensure the safe and effective use of high-pressure drain blasters while preventing damage to your pipes, follow these instructions:
- Inspect Drainage System:
- Identify Blockage: Before using the drain blaster, confirm the location and nature of the clog to determine if a high-pressure solution is suitable.
- Prepare the Area:
- Clear Access: Remove any obstructions around the drain and ensure there are no objects or debris that could be dislodged by the blast.
- Protect Surfaces: Cover nearby surfaces with towels or protective materials to prevent water splashes or debris from causing damage.
- Operating the Drain Blaster:
- Secure Connection: Ensure a tight seal between the blaster nozzle and the drain opening to maximize pressure transfer.
- Aim Carefully: Direct the blast towards the clog while maintaining a safe distance to prevent back splashes.
- Cautious Trigger Use: Apply short bursts of pressure rather than prolonged blasts to avoid excessive force on the pipes.
- Post-Operation Checks:
- Assess Effectiveness: After using the blaster, check if the drain is now flowing freely. Repeat the process if necessary.
- Inspect Drainage: Monitor the drain for any signs of leakage or unusual sounds that could indicate pipe damage.
Comparing Air Blasters to Other Tools in Terms of Efficacy and Ease of Use
In terms of efficacy and ease of use, high-pressure air blasters can be compared to other tools commonly used for drain cleaning, such as:
- Chemical Drain Cleaners:
- Efficacy: Chemical cleaners rely on the dissolution of clogs through chemical reactions, which may not always be effective against stubborn blockages.
- Ease of Use: Chemical cleaners are easy to apply but can pose health and environmental risks due to their toxic nature.
- Plungers:
- Efficacy: Plungers work by creating a vacuum to dislodge clogs, making them effective for minor blockages but less so for dense or solid obstructions.
- Ease of Use: Plungers are simple and user-friendly, requiring manual effort without the need for additional equipment.
- Snakes/Augers:
- Efficacy: Drain snakes or augers physically break up clogs by rotating and pushing through the blockage, offering high efficacy for most types of clogs.
- Ease of Use: Snakes require some skill to operate effectively but are generally straightforward once users familiarize themselves with the tool.
- Comparative Analysis:
- Efficacy: High-pressure air blasters are effective against a wide range of clogs, particularly those caused by organic matter or debris.
- Ease of Use: While air blasters can be powerful tools, they require proper handling to prevent damage to pipes, making them slightly more complex to use than plungers but less so than snakes.
By understanding the science behind high-pressure drain blasters, following safe usage instructions, and comparing them to other drain-cleaning tools, you can make informed decisions on the most suitable method for addressing clogs in your plumbing system.
Bent Wire Hangers: The DIY Approach

- Turning a simple wire hanger into an effective unclogging tool
- Step-by-step DIY guide to create and use a homemade wire hanger tool
- The limitations and precautions of this makeshift method
Let’s explore in detail the process of turning a simple wire hanger into an effective unclogging tool, providing a step-by-step DIY guide on how to create and use a homemade wire hanger tool, as well as discussing the limitations and precautions associated with this makeshift method:
Turning a Simple Wire Hanger Into an Effective Unclogging Tool
A wire hanger can be transformed into a useful unclogging tool with a few simple modifications. This DIY approach is cost-effective and can effectively tackle minor to moderate clogs in your drains.
Materials Needed:
– Wire hanger with a hook at one end
– Pliers or wire cutters
– Gloves (optional, for safety)
Step-by-Step DIY Guide to Create and Use a Homemade Wire Hanger Tool
Creating the Tool:
- Straighten the Hanger: Use the pliers or wire cutters to straighten out the wire hanger, ensuring you have a long and relatively straight piece of wire to work with.
- Shape the Hook:
– At one end of the wire, create a small hook by bending the wire at a 90-degree angle. This hook will act as the grabbing mechanism for pulling out clogs.
- Adjust Length:
– Depending on the depth of your drain, adjust the length of the wire to ensure it can reach the blockage without difficulty.
Using the Homemade Wire Hanger Tool:
- Insert Into Drain:
– Carefully insert the hooked end of the wire hanger into the drain opening until you feel resistance or reach the clog.
- Hooking the Clog:
– Maneuver the hook around the obstruction, trying to latch onto it securely.
- Pulling Out the Clog:
– Once the hook is firmly attached to the clog, gently pull the wire hanger out of the drain, bringing the clog with it.
- Repeat if Necessary:
– If the clog is not entirely cleared, repeat the process until the flow of water improves.
Limitations and Precautions of This Makeshift Method
While using a homemade wire hanger tool can be effective for minor clogs, it has limitations and precautions to consider:
Limitations:
- Limited Reach: The length of the wire hanger may not be sufficient to reach deep or complex clogs within the plumbing system.
- Mechanical Force: This method relies on manual force, making it less effective against hardened or compacted blockages.
- Pipe Damage: Vigorous or improper use of the wire hanger can potentially damage sensitive pipes, especially in older plumbing systems.
Precautions:
- Wear Gloves: Protect your hands with gloves to avoid injuries from sharp edges of the wire hanger or potential contact with debris.
- Gentle Application: Apply gentle pressure when maneuvering the wire hanger to avoid causing damage to the drain pipes.
- Know Your Limits: If the clog persists or seems challenging to remove, consider seeking professional assistance to prevent further damage.
By following these steps to create and use a homemade wire hanger tool, along with understanding its limitations and taking necessary precautions, you can effectively address minor clogs in your drains in a cost-effective and DIY manner.
Boiling Water: Nature’s Solvent
- How hot water can effectively dissolve certain types of clogs
- Instructions on safely using boiling water without damaging pipes
- Combining hot water with other substances for enhanced results
How Hot Water Can Effectively Dissolve Certain Types of Clogs
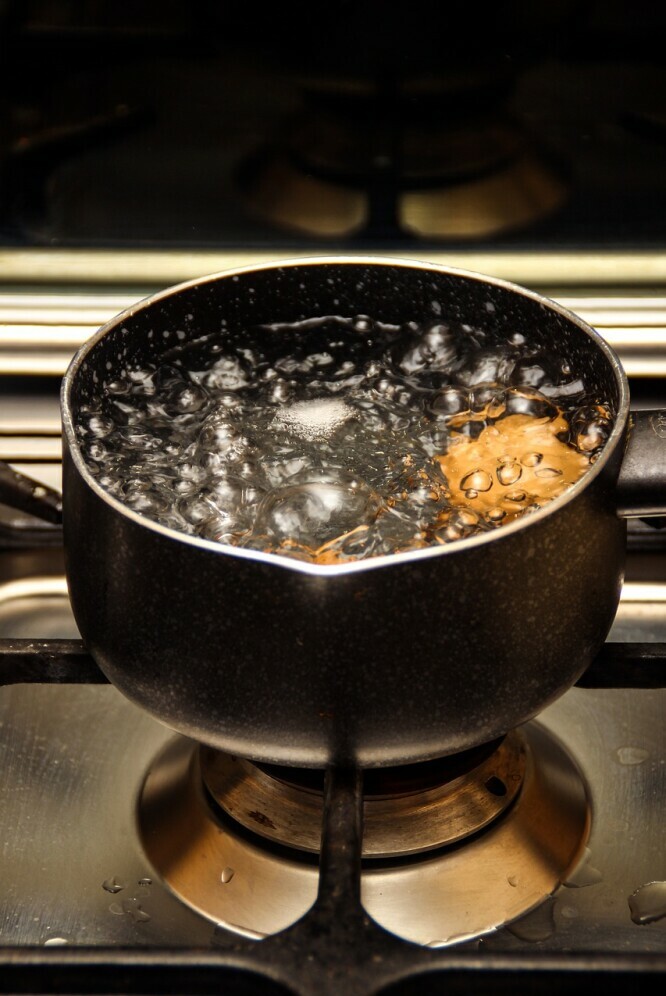
Hot water is a simple yet effective tool for clearing certain types of clogs from drains. When introduced to a clog, hot water can help break down substances like grease, soap scum, and organic matter, facilitating their removal from the pipe. The heat from the water can weaken the clog and loosen its grip on the inner walls of the plumbing, making it easier to flush away. It is particularly useful for addressing minor blockages in kitchen sinks and bathroom drains caused by the accumulation of greasy residues and soap scum.
Instructions on Safely Using Boiling Water Without Damaging Pipes
When using boiling water to clear clogs, it’s crucial to follow these safety instructions to avoid damaging your pipes:
- Boil Water Safely: Boil water in a kettle or pot on a stovetop until it reaches a rolling boil. Do not use water from the microwave as it may not be uniformly heated.
- Allow Water to Cool Slightly: After boiling, allow the water to cool for a few minutes to reduce its temperature slightly. Extremely hot water can crack or damage older or weakened pipes.
- Pour Water Carefully: Slowly and steadily pour the hot water directly into the drain opening. Avoid splashing or spilling hot water on yourself or surrounding surfaces.
- Flush with Cold Water: After pouring the hot water, follow up with a flush of cold water to help further break down the clog and carry it away.
- Monitor Effectiveness: Observe the drain after using hot water to see if the clog has started to clear. If the water is draining more freely, you can repeat the process if necessary.
Combining Hot Water with Other Substances for Enhanced Results
To enhance the effectiveness of hot water in clearing clogs, you can combine it with other substances known for their cleaning properties:
- Baking Soda and Vinegar: Create a mixture of baking soda and vinegar and pour it down the drain. Follow this with hot water to create a fizzing reaction that can help dislodge and break down clogs.
- Salt and Baking Soda: A mixture of salt and baking soda, followed by hot water, can act as a natural abrasive agent that helps scrub away debris and clear minor clogs.
- Dish Soap: Adding a few squirts of dish soap before pouring hot water can help lubricate the pipes and break down greasy clogs effectively.
By combining hot water with these substances, you can enhance its clog-clearing abilities and maintain the health of your pipes without causing damage.
Using hot water safely and effectively, either alone or in combination with other substances, can be a cost-efficient and environmentally friendly method to tackle certain types of clogs in your drains, keeping your plumbing system running smoothly.
Wet/Dry Vacuums: Power Suction for Stubborn Clogs
- The versatility of wet/dry vacuums in dealing with watery messes and clogs
- Guidelines on using a wet/dry vacuum to unclog drains
- Cleaning and maintaining your vacuum post-unclogging
The Versatility of Wet/Dry Vacuums in Dealing with Watery Messes and Clogs
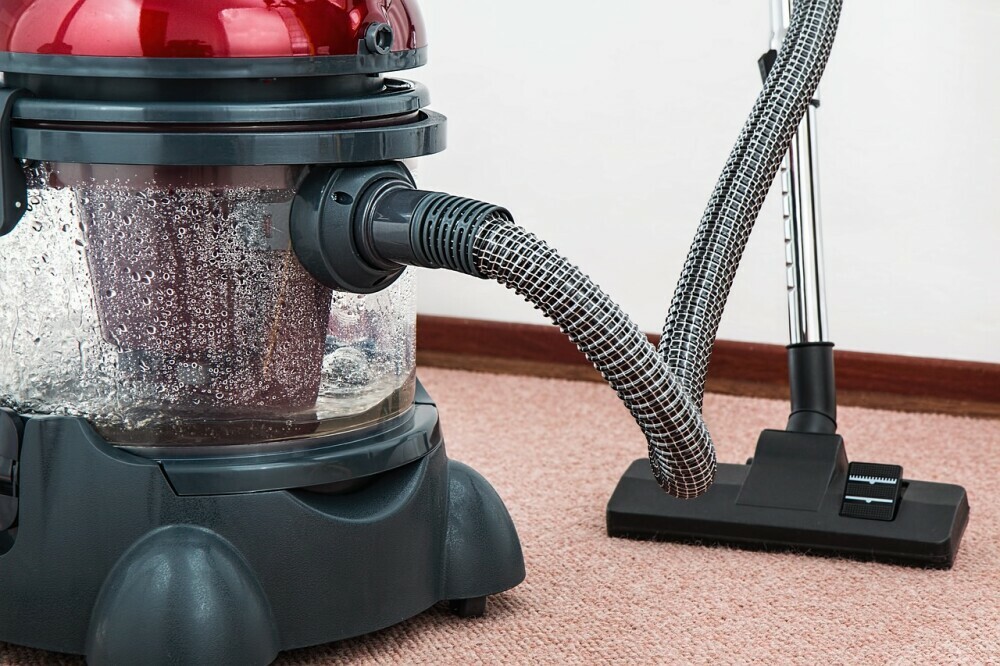
Wet/dry vacuums are highly versatile tools that can handle both wet and dry materials, making them ideal for various cleaning tasks, including addressing watery messes and clogs. These vacuums excel in extracting liquids, debris, and even stubborn clogs from drains, providing a quick and efficient solution for maintaining clean and functional plumbing systems.
Key Features:
- Suction Power: Wet/dry vacuums are equipped with strong suction capabilities, allowing them to effectively remove both liquid and solid waste from drains.
- Versatility: These vacuums can tackle a wide range of cleaning tasks, from spills and leaks to clogs in sinks, toilets, and drains.
- Easy Disposal: The ability to handle wet materials means you can easily dispose of liquid waste without damaging the vacuum.
Guidelines on Using a Wet/Dry Vacuum to Unclog Drains
When using a wet/dry vacuum to unclog drains, follow these guidelines for optimal results:
Preparation:
- Select the Right Attachment: Choose a narrow attachment, such as a crevice tool or a small diameter hose, to fit into the drain opening.
- Secure the Connection: Ensure a tight seal between the attachment and the drain opening to maximize suction power.
Unclogging Process:
- Set the Vacuum to Wet Mode: If your wet/dry vacuum has different modes, switch it to the wet setting to handle liquids effectively.
- Insert the Attachment: Carefully insert the attachment into the drain opening, ensuring it reaches the clog.
- Apply Suction: Turn on the vacuum and slowly move the attachment back and forth to dislodge and pull out the clog.
- Monitor Progress: Keep an eye on the vacuum’s suction power and the draining water to track the unclogging progress.
Post-Unclogging:
- Flush with Water: After unclogging, run some water down the drain to check if the clog is completely cleared.
- Clean the Vacuum: Empty the vacuum canister of any debris, rinse out the filter, and clean the attachments to prevent clogs and maintain optimal performance.
Cleaning and Maintaining Your Vacuum Post-Unclogging
To ensure the longevity and efficiency of your wet/dry vacuum after using it to unclog drains, follow these cleaning and maintenance tips:
- Empty the Canister: Regularly empty the canister of debris and liquid waste to prevent buildup and maintain suction power.
- Clean the Filter: Rinse or replace the filter as needed to prevent clogs and maintain proper airflow.
- Check Attachments: Inspect and clean attachments to remove any debris or obstructions that may affect performance.
- Store Properly: Store the vacuum in a dry and clean environment to prevent mold growth and damage to its components.
By following these guidelines on using a wet/dry vacuum to unclog drains effectively and maintaining it post-unclogging, you can leverage the versatility of this tool for various cleaning tasks and ensure its longevity and optimal performance.
Chemical Drain Cleaners: Caution Required
- Types of chemical drain cleaners and their potential risks
- The right way to use chemical cleaners without harming your pipes or health
- Why chemical cleaners should be a last resort and alternatives to consider
Types of Chemical Drain Cleaners and Their Potential Risks
Chemical drain cleaners are categorized into different types based on their active ingredients and formulations, each with its own set of potential risks:
- Caustic Drain Cleaners: These cleaners typically contain ingredients like lye or caustic potash, which work by generating heat to dissolve clogs. Risks include skin and eye irritation, chemical burns, and potential damage to older or sensitive plumbing fixtures.
- Acidic Drain Cleaners: Acid-based cleaners, such as those containing sulfuric acid or hydrochloric acid, are effective against mineral deposits and organic clogs but can corrode metal pipes, cause chemical burns, and emit harmful fumes.
- Enzymatic Drain Cleaners: Enzyme-based cleaners use biological reactions to break down organic matter in drains. While generally safer for pipes, they may take longer to show results compared to caustic or acidic cleaners.
- Oxidizing Drain Cleaners: These cleaners use ingredients like bleach or peroxide to oxidize and break down clogs. Risks can include skin and respiratory irritation and potential damage to certain materials.
The Right Way to Use Chemical Cleaners Without Harming Your Pipes or Health
To minimize the risks associated with chemical drain cleaners, follow these guidelines for safe and effective use:
- Read and Follow Instructions: Always read the manufacturer’s instructions carefully and follow the recommended dosage and safety precautions.
- Protect Yourself: Wear protective gear such as gloves, goggles, and a mask to shield your skin, eyes, and respiratory system from chemical exposure.
- Ventilate the Area: Ensure adequate ventilation by opening windows or using fans to disperse fumes and minimize inhalation risks.
- Use Correctly: Pour the cleaner directly into the drain as directed, avoiding contact with skin, eyes, and surrounding surfaces. Do not mix different types of cleaners.
- Wait and Flush: Allow the cleaner to work for the recommended time before flushing the drain with plenty of water to remove debris and residual chemicals.
Why Chemical Cleaners Should Be a Last Resort and Alternatives to Consider
While chemical drain cleaners can be effective in some situations, they should be considered a last resort due to the potential risks they pose to both your plumbing and health. Consider these safer alternatives before resorting to chemical cleaners:
- Plungers and Snakes: Manual tools like plungers or drain snakes are effective for physically breaking up and removing clogs without relying on harsh chemicals.
- Boiling Water: Hot water can be a simple yet effective way to dissolve grease and organic build-up in drains without the use of chemicals.
- Baking Soda and Vinegar: A mixture of baking soda followed by vinegar can create a natural fizzing reaction that helps break down clogs and deodorize drains.
- Enzyme-Based Cleaners: Safer for pipes and the environment, enzyme-based cleaners can effectively break down organic clogs over time.
Using chemical cleaners as a last resort and considering safer alternatives can help protect your plumbing system, minimize health risks, and promote environmentally friendly cleaning practices.
By understanding the types of chemical drain cleaners, practicing safe usage, and exploring alternative methods, you can effectively address drain clogs while safeguarding your pipes, health, and the environment.
Conclusion: Building Your Drain Unclogging Toolkit
- Recapping the essential tools for tackling most household clogs
- Considering environmentally-friendly practices in drain maintenance
- Encouragement to safely and effectively use the discussed tools for a clog-free home
Recapping the Essential Tools for Tackling Most Household Clogs
- Plunger: A plunging tool is essential for clearing simple clogs in sinks, showers, and toilets by creating pressure to dislodge blockages.
- Plumbing Snake (Auger): This flexible tool is useful for reaching and removing deeper clogs in drains and pipes that a plunger may not be able to tackle.
- Zip-It Tool: This inexpensive tool with small barbs on a plastic strip is excellent for removing hair and debris from sink and shower drains.
- Wet/Dry Vacuum: A wet/dry vacuum can be used to suction out clogs or standing water from drains, especially in situations where plunging isn’t effective.
- Pipe Wrench: This adjustable wrench is handy for loosening or tightening plumbing fittings and removing traps to access and clear clogs.
- Bucket or Basin: Having a container to catch water or debris when working on clogs helps prevent spills and makes cleanup easier.
Considering Environmentally-Friendly Practices in Drain Maintenance
- Preventive Maintenance: Regularly cleaning drain stoppers, using drain strainers, and avoiding pouring grease or harsh chemicals down drains can prevent clogs and minimize the need for harsh interventions.
- Natural Drain Cleaners: Opt for eco-friendly alternatives like baking soda, vinegar, or enzyme-based cleaners to break down organic matter without harming your pipes or the environment.
- Hot Water Flushing: Periodically flushing drains with hot water can help prevent buildup and keep drains flowing smoothly without the need for chemicals.
- Biodegradable Products: Choose cleaning products that are biodegradable and safe for the environment to reduce the impact of household activities on water systems.
- Professional Maintenance: If persistent clogs require professional help, consider hiring plumbers who employ eco-friendly practices and products to address plumbing issues.
Encouragement to Safely and Effectively Use the Discussed Tools for a Clog-Free Home
- Read Instructions: Familiarize yourself with how to use each tool correctly by reading instructions or watching tutorials to ensure safe and effective usage.
- Protective Gear: Wear appropriate protective gear such as gloves and safety glasses when handling tools or working with drain-cleaning solutions to prevent injury.
- Methodical Approach: Start with the least invasive tools like plungers before moving on to more specialized equipment to avoid causing damage to pipes.
- Patience: Take your time and follow proper techniques when using tools to clear clogs, as rushing the process can lead to ineffective results or further blockages.
- Maintenance Routine: Incorporate regular drain maintenance using tools and eco-friendly practices to promote a clog-free and environmentally-conscious household.
By having the essential tools on hand, embracing environmentally-friendly practices, and using tools safely and effectively, you can maintain clog-free drains, preserve your plumbing system, and contribute to a sustainable home environment.
DIY Plumbing Solutions
OnlyDrainz is dedicated to providing DIY plumbing solutions and step-by-step methods for unclogging drains. With a shortage of licensed plumbers focusing on new construction and remodels, we aim to empower drain cleaning professionals and homeowners to educate themselves and create affordable drain cleaning solutions for their homes and neighborhoods.
Typically, drain cleanings can cost between $200-$400 until reaching the main sewer line. Dealing with larger pipes requires specialized equipment and comes with higher risks.
Our focus at OnlyDrainz is to educate our readers on fixing household drains such as kitchen sinks, bathroom sinks, showers, tubs, utility sinks, and floor drains. Our target keywords revolve around teaching effective methods for unclogging drains.
Authors Choice: